Mastering Beans and Lentils: Affordable, Nutritious, and Easy
I am so over the “aesthetic” cooking videos that make you feel like you need a $500 Le Creuset dutch oven and three hours of uninterrupted sunlight just to make a basic meal. Honestly, if I see one more influencer suggest that you need a specialized, high-tech gadget to master how to cook beans and lentils, I might actually lose it. Most of that stuff is just expensive noise designed to make a simple task feel like a lifestyle achievement. In reality, beans are the ultimate budget-friendly, low-maintenance fuel, but people make them way more complicated than they ever need to be.
I’m not here to give you a culinary masterclass or a list of impossible-to-find spices. Instead, I want to give you a repeatable system that works even when you’re running on four hours of sleep and a lukewarm coffee. I’m going to show you the most efficient, no-nonsense way to handle dried legumes so they actually taste good without turning your kitchen into a disaster zone. We’re focusing on functional cooking that fits into a messy, real-world schedule—no fancy equipment required.
Soaking Dried Beans vs No Soak Choosing Your Level of Effort
Soaking dried beans vs no soak: Choosing your level of effort
Look, I get it. The idea of planning a meal twelve hours in advance feels like a massive chore when you’re already running on fumes. If you’re a “plan everything” person, an overnight soak is great—it softens the skins and can actually help with digestion. But if you’re more of a “decide what’s for dinner at 6:00 PM” person, you don’t need to panic. You can absolutely skip the soak and just adjust your timeline.
The real difference comes down to cooking times for different legumes and how much patience you have that evening. If you skip the soak, you’re looking at a longer stretch on the stove, and you’ll need to keep a closer eye on them to avoid preventing mushy beans from turning into an unintentional puree. For me, if I’m using a slow cooker or a pressure cooker, I usually skip the soak entirely because the heat does the heavy lifting anyway. But if you’re doing a standard stovetop simmer, just give yourself an extra hour of buffer time. It’s not about doing it the “right” way; it’s about choosing the method that fits your current energy level.
Stovetop Bean Cooking Methods That Actually Work When Life Gets Busy
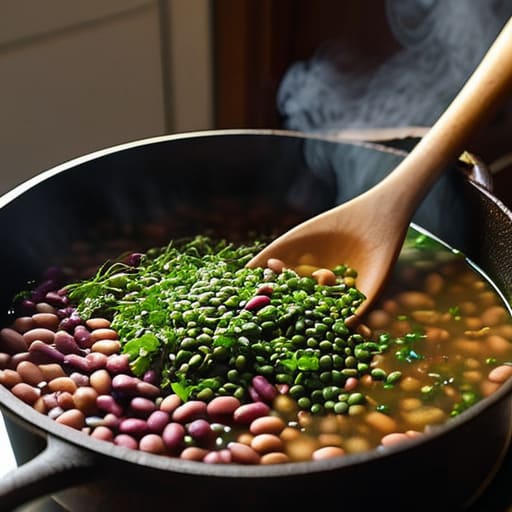
Look, I get it. Between client calls and trying to keep my own life from falling apart, the idea of hovering over a stove for two hours feels like a massive ask. If you aren’t someone who enjoys the “set it and forget it” vibe of pressure cooker bean recipes, you need a stovetop strategy that doesn’t require constant supervision. The trick to mastering stovetop bean cooking methods isn’t about fancy techniques; it’s about choosing the right vessel and managing your heat. A heavy-bottomed pot is your best friend here—it distributes heat more evenly, which is the secret to preventing mushy beans while ensuring the centers stay creamy rather than chalky.
When you’re in the middle of a hectic week, don’t feel like you have to cook everything from scratch every single day. I usually aim for a “batch and buffer” approach. I’ll cook a large pot of whatever legume I have on hand—usually chickpeas or black beans—and then portion them out. This way, I have a protein-packed base ready to toss into a salad or a quick grain bowl. It’s not about being a gourmet chef; it’s about having a repeatable system that works when you’re too tired to even think about meal prep.
5 ways to stop overcomplicating your bean game
- Stop being a perfectionist with the seasoning. You don’t need a spice rack from a gourmet shop; a bay leaf, a smashed garlic clove, and some salt added early on is usually all you need to get that deep, savory flavor without the stress.
- Don’t trust the timer blindly. Every bean is different, and every stove is different. Instead of staring at the clock, start checking the texture about 15 minutes before you think they’ll be done. You want them creamy, not mushy.
- Salt isn’t the enemy. There’s this old myth that salting your soaking water makes beans tough, but honestly? Salting your cooking liquid helps season them from the inside out. Just don’t go overboard if you’re planning to add salt later.
- Keep a “backup” stash of canned beans for those nights when the “system” fails. If you forgot to soak or you’re too exhausted to wait for a stovetop, a quick rinse of a canned bean and a pan with some olive oil can save your dinner.
- Use the leftover liquid. If you’re cooking beans on the stove, don’t just dump that liquid down the drain. It’s full of starch and flavor—use it as a base for a soup or a sauce to add instant body to whatever you’re making.
The bottom line on bean prep
Don’t overthink the soak; if you’ve got the time, do it, but if you’re staring at a pile of dishes and a deadline, just skip it and add a little extra cooking time.
Ditch the complex recipes and stick to a basic ratio of water, salt, and aromatics—it’s a repeatable system that works every single time.
Focus on the texture, not the timer; every bean is different, so use your eyes and a fork rather than strictly following a clock.
The real secret to bean cooking
Stop looking for the “perfect” technique in a cookbook and just find the one that doesn’t make you want to quit cooking by Tuesday. Whether you soak them overnight or just throw them in a pot when you’re starving, the goal isn’t a culinary masterpiece—it’s a reliable, cheap, and filling system that actually fits into your real, messy life.
Nadia Halloway
Don't overthink the process
At the end of the day, whether you’re committing to a long overnight soak or just throwing a bag of lentils into a pot during your lunch break, the goal is the same: getting decent food on your plate without a meltdown. We’ve covered the spectrum from the slow-and-steady stovetop methods to the “I have zero time” shortcuts, and the takeaway is simple. You don’t need a culinary degree or a kitchen full of specialized gadgets to master these staples. Just pick a method that fits your current energy level and stick to it. If you’re exhausted, go for the quick lentils; if you’ve got a slow Sunday, let those chickpeas soak and simmer. It’s all about building a system that works for your actual life, not some idealized version of it.
I know it can feel overwhelming when you’re staring at a bag of hard, dry beans and a sink full of dishes, but I promise it gets easier. Cooking from scratch isn’t about achieving some Pinterest-perfect meal every single night; it’s about the small, repeatable wins that save you money and keep you fed. Don’t let the fear of a ruined batch stop you from trying. Even if the texture isn’t perfect the first time, you’ll learn. Just keep showing up in your kitchen, one pot at a time, and eventually, these basics will become second nature.
Frequently Asked Questions
Do I really need to add salt to the water, or will that make them tough?
This is the classic kitchen debate, and honestly, I used to be terrified of it. But here’s the truth: salt won’t make them tough. In fact, if you salt the water early, it actually helps the skins soften more evenly. Think of it like seasoning a piece of wood before you stain it—it goes deeper. Just don’t go overboard. A good handful of salt is plenty to ensure they actually taste like food, not just mush.
Can I just use canned beans to save time, or am I losing out on everything?
Look, if you’re staring at a pile of laundry and a mountain of work, use the canned beans. I’m not going to lecture you on “purity” here. You aren’t losing everything; you’re just trading a little texture and cost-efficiency for time. Just give them a quick rinse to wash away that metallic, salty brine, and you’re good to go. It’s not a gourmet masterpiece, but it’s a functional system that gets you fed.
How do I know when they're actually done without turning them into mush?
The “mush factor” is real, and honestly, it’s the biggest fear when you’re working with dried legumes. Don’t rely on a timer—it’s a trap. Instead, use the “spoon and bite” method. Take a bean out, let it cool for a second, and actually bite it. You’re looking for a creamy center with no grainy, hard core. If it’s still chalky, give it another ten minutes. Better to check early than to end up with bean soup.
Is there a way to prep a big batch of beans for the week without them getting weird in the fridge?
The secret is all in the cooling and the container. Never, ever toss hot beans straight into a Tupperware; the steam creates condensation, which leads to that weird, slimy texture by Wednesday. Let them cool completely on the counter first. I swear by glass airtight containers—they keep the smell contained and the beans much fresher. If you’ve gone overboard, just freeze them in small portions. It’s a tiny bit of extra effort that saves your sanity.
