Effective Homemade Cleaning Supplies That Really Work
I’m so tired of seeing those “aesthetic” cleaning videos where people spend forty dollars on glass spray bottles and essential oils just to make a lavender-scented mist. Honestly, if I see one more influencer claiming that a specific blend of expensive botanical extracts is the only way to sanitize a countertop, I might actually lose it. Most of those ultra-curated tutorials are just a distraction from the fact that you don’t need a lifestyle overhaul to have a tidy home. You don’t need a cabinet full of specialized chemicals or a massive budget to master diy cleaning products; you just need a few things you probably already have in your pantry.
I’m not here to give you a chemistry lesson or suggest you spend your entire weekend DIYing a dozen different concoctions. Instead, I want to share the low-stakes systems that actually work when I’m juggling freelance deadlines and a messy apartment. I’ll show you the few, versatile recipes that actually cut through grease and grime without the fancy markup. We’re focusing on functional simplicity here—stuff that gets the job done so you can get back to your actual life.
Low Cost Wins With Vinegar and Baking Soda Cleaning

Look, I know the temptation to wander down the aisle of the organic grocery store and grab every color-coded, glass-bottled spray that looks pretty on a countertop. But honestly? Most of that is just expensive water. If you want to actually save money without sacrificing a clean house, you need to get comfortable with the basics. I’m talking about vinegar and baking soda cleaning as your heavy lifters. It’s not glamorous, and it definitely won’t win any awards for scent, but it works. I keep a large jug of white vinegar in my pantry because it’s the ultimate multitasker—it cuts through grease, dissolves hard water stains, and even freshens up my laundry without the chemical headache.
When things get a little more stubborn, like a crusty stovetop or a stained sink, that’s when I bring in the baking soda. It’s essentially a gentle abrasive that doesn’t scratch your surfaces. If you mix the two, you get that satisfying fizz that does most of the heavy lifting for you. It’s one of those cost-effective cleaning solutions that actually delivers on its promise. Plus, if you’re worried about what your dog is licking off the floor, these are some of the safest non-toxic household cleaners you can find. If the smell of vinegar is too much for you, just toss in a few drops of lemon or lavender essential oils. It’s simple, it’s cheap, and it works when life gets messy.
Small Systems for Non Toxic Household Cleaners
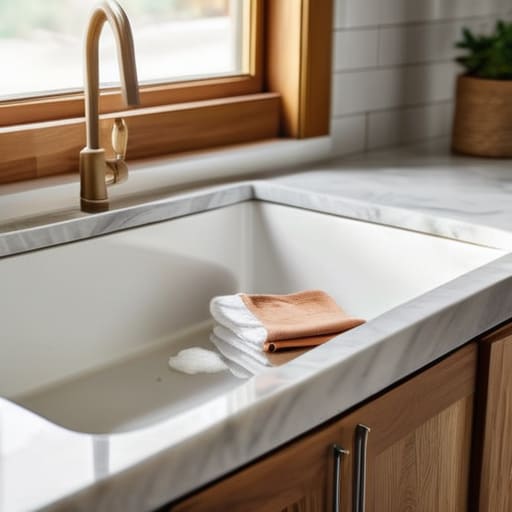
The biggest mistake I see people make with DIY cleaning is trying to turn it into a science experiment. You don’t need a lab setup or a shelf full of specialty bottles to make this work. For me, it’s all about creating a “cleaning station” that actually stays accessible. I keep a small spray bottle of diluted vinegar and a jar of baking soda right under the sink, not tucked away in a back cupboard. When you have non-toxic household cleaners within arm’s reach, you’re much more likely to wipe down a counter the second it gets sticky, rather than letting the mess pile up until it feels overwhelming.
If you’re worried about the scent—because, let’s be real, straight vinegar smells like a salad dressing factory—this is where you can get a little creative without breaking the bank. Adding a few drops of essential oils for cleaning, like lemon or eucalyptus, can mask that sharp tang and make your space feel actually fresh. It’s also a much better way to ensure safe cleaning for pets and kids; I’d much rather deal with a slightly citrusy smell than worry about my dog licking up harsh chemical residues off the floor. Keep it simple, keep it accessible, and don’t overthink it.
Real-World Rules for DIY Cleaning (Without the Mess)
- Don’t go overboard with the essential oils. I know they smell amazing, but if you use too much, you’re just creating a sticky, scented sludge that’s harder to clean than the actual dirt. A few drops in a spray bottle is plenty.
- Label everything. Seriously. When you have three different spray bottles that look identical, you’re going to accidentally spray vinegar on a surface that can’t handle it. Grab a Sharpie and a roll of masking tape; it takes ten seconds and saves a massive headache.
- Stop trying to make “all-purpose” cleaners do everything. A vinegar spray is great for windows, but it’s going to be a nightmare on natural stone. Match your DIY solution to the specific surface so you aren’t stripping the finish off your thrifted finds.
- Keep your supplies in one small, reachable bin. If your cleaning supplies are tucked away in a high cabinet or a deep closet, you won’t use them when things get messy. Keep the basics right under the sink so the barrier to starting is as low as possible.
- Test a tiny, hidden spot first. I’ve learned this the hard way. Before you douse a vintage chair or a new rug in your homemade concoction, dab a little on a corner to make sure you aren’t accidentally ruining something you love.
The Bottom Line on DIY Cleaning
Forget the expensive, “all-natural” branded sprays; a bottle of white vinegar and a box of baking soda can handle about 90% of your daily messes without breaking the bank.
Don’t aim for a perfectly sanitized showroom; focus on building a simple, repeatable routine that works even on the days when you’re running on three hours of sleep and too much caffeine.
Keep your DIY setup functional by prepping small batches of cleaners in reusable bottles so you aren’t scrambling to mix ingredients every single time a spill happens.
The Reality Check
“We don’t need a cupboard full of expensive, ‘eco-friendly’ sprays that smell like a spa retreat; we just need a few reliable ingredients that actually work when we don’t have the energy to overcomplicate things.”
Nadia Halloway
Keeping It Real Moving Forward
At the end of the day, you don’t need a chemistry degree or a cabinet full of expensive, designer-labeled bottles to keep your space livable. We’ve talked about how a simple mix of vinegar and baking soda can tackle most of your daily messes, and how building a tiny, repeatable system for your cleaning supplies can save you both money and mental energy. The goal isn’t to have a home that looks like a curated Pinterest board; it’s about having a home that actually functions without draining your bank account or your sanity. Focus on the small, repeatable wins rather than trying to overhaul your entire lifestyle in a single weekend.
If you find yourself staring at a pile of dishes or a dusty countertop and feeling completely overwhelmed, just start with one thing. Pick one spray, grab one cloth, and just do five minutes of work. Perfection is a trap that keeps us paralyzed, but intentional simplicity is what actually gets the job done. Life is going to get messy—that’s just a fact of being human. Don’t let the clutter convince you that you’ve failed. Just reset, grab your vinegar, and move forward one small step at a time. You’ve got this.
Frequently Asked Questions
Is it actually safe to mix these ingredients, or am I going to accidentally create something toxic in my kitchen?
Look, I get it. I’ve definitely had that moment of hesitation standing over a sink, wondering if I’m about to turn my kitchen into a science experiment gone wrong. The short answer? Vinegar and baking soda are safe, but they’re also a bit of a letdown if you mix them in a bottle. They basically neutralize each other, turning into salty water. Use them separately for maximum impact—fizzing is fun, but it doesn’t actually clean better.
Can I use these DIY concoctions on expensive surfaces like marble or granite without ruining them?
Short answer: Please, for the love of your countertops, do not. I know vinegar is the MVP of my DIY toolkit, but that acidity will absolutely eat away at the sealant on marble or granite, leaving permanent dull spots. If you have nice stone, skip the science experiments. Just use a tiny bit of pH-neutral dish soap and warm water. It’s not “aesthetic,” but it keeps your surfaces intact.
How long can I actually keep these homemade sprays before they go bad or start smelling weird?
Here’s the truth: because we aren’t adding heavy-duty preservatives, these sprays have a shelf life. If you’re just using water, vinegar, and essential oils, aim to use them up within two to three weeks. If they start smelling funky or looking cloudy, toss them. Honestly, I usually make small batches—just enough for a week—to avoid waste. It’s much better to spend five minutes mixing a fresh bottle than cleaning up a moldy mess.
Do I really need to buy specific spray bottles, or can I just repurpose the old ones I already have lying around?
Please, don’t even think about running to the store for fancy glass spray bottles. That is exactly the kind of “aesthetic productivity” trap I’m talking about. Just grab your old, empty cleaner bottles, give them a thorough rinse, and you’re good to go. If you want to be a little more intentional, you can find cheap glass ones later, but for now? Repurposing what you already have is the ultimate low-stakes win.
