A Newbie’s Guide to Using a Power Drill
I was halfway through trying to mount a floating shelf in my tiny studio apartment when the drill slipped, leaving a jagged, ugly crater in my only decent piece of drywall. I sat there on the floor, surrounded by sawdust and a mounting sense of dread, wondering why every “simple” DIY project felt like a battle against my own incompetence. Here is the truth: most people think you need a massive, expensive workshop to be handy, but learning how to use a drill isn’t about having the flashiest gear or a degree in engineering. It’s actually just about understanding a few basic rhythms so you don’t end up destroying your furniture (or your sanity) like I did.
Forget the intimidating, twenty-step manuals that make you feel like you’re prepping for a NASA launch. I’m going to skip the fluff and show you the no-nonsense mechanics of gripping, steadying, and controlling the tool so you can actually get things done. We’re focusing on the small, repeatable movements that turn a terrifying power tool into something that actually works for you. By the end of this, you’ll know exactly how to make those steady holes without the mess or the unnecessary stress.
Guide Overview
Tools & Supplies
- Power drill (cordless or corded)
- Drill bits (set appropriate for material)
- Workpiece (wood, metal, or plastic)
- Safety goggles (1 pair)
Step-by-Step Instructions
- 1. First things first, pick the right bit for the job. If you’re working on one of my thrifted mid-century sideboards, you’ll want a wood bit, not a metal one. Using the wrong one is a fast track to ruining a good piece of wood, so just double-check the tip before you go any further.
- 2. Next, you need to select your speed and torque. Most drills have a little dial on the top. Think of it like a car: low speed is for heavy-duty driving (like drilling big holes), and high speed is for smaller, faster tasks. If you’re feeling unsure, start on the lower setting; you can always speed up, but you can’t undo a stripped screw.
- 3. Mark your spot with a pencil, but don’t just wing it. I’ve learned the hard way that “eyeballing it” usually leads to crooked holes. If you want to be a pro, use a tiny nail or a center punch to make a small indentation first. This gives your drill bit a place to “sit” so it doesn’t skitter across the surface when you pull the trigger.
- 4. Now, get your grip right. Hold the drill with both hands if you can—one on the handle and one on the back to steady it. You want to apply steady, even pressure straight into the material. If you push too hard or at an angle, the bit is going to wander, and that’s when things get messy.
- 5. Squeeze the trigger like you mean it, but start slow. You don’t need to go full throttle the second you touch the button. Ease into the rotation to get the hole started, then increase your speed once the bit has found its groove. It’s all about that controlled rhythm.
- 6. Once you’re through, don’t just yank the drill out. Pull it back out slowly and steadily while the bit is still spinning. If you pull it out while it’s stationary, you’re likely to snag the material and leave a jagged, ugly exit hole that’s a pain to fix later.
- 7. Finally, take a second to clear the debris. Use a vacuum or a damp cloth to get the sawdust out of the hole. It might seem like an extra step, but it makes it so much easier to see if your screw or fastener is actually sitting flush against the surface.
Mastering How to Hold a Power Drill for Steady Results
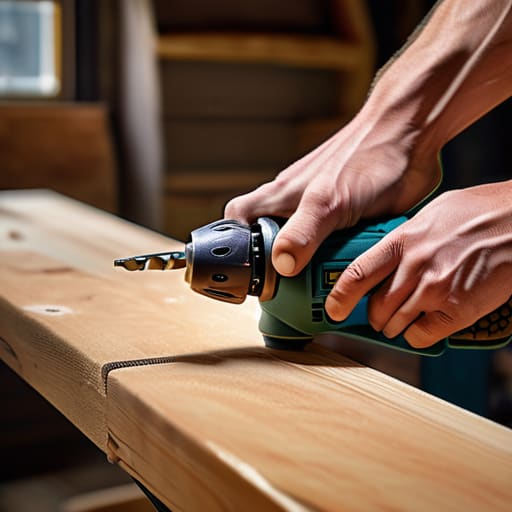
Look, I know it feels a little intimidating the first time you pull the trigger and that motor starts whining. It’s easy to feel like you’re fighting the tool rather than working with it. The biggest mistake I see (and I’ve definitely made while trying to fix up a thrifted dresser) is holding the drill with just your fingertips like it’s a TV remote. You need a firm, two-handed approach for stability. Wrap your dominant hand around the grip and use your other hand to support the back of the drill or steady the front. This keeps your wrist from snapping sideways if the bit catches, which is a total recipe for a bruised thumb.
Learning how to hold a power drill is really about finding your center of gravity. You want your elbow tucked relatively close to your side to create a stable tripod with your body. If you’re feeling shaky, don’t force it; just take a breath and reset your stance. This is especially crucial when you’re adjusting drill torque settings for more delicate tasks, like driving a screw into a piece of mid-century teak. If you’re too loose, you’ll strip the screw; if you’re too tense, you’ll lose control. Just aim for a steady, controlled pressure—not a frantic shove.
Essential Cordless Drill Safety Precautions for Real Life
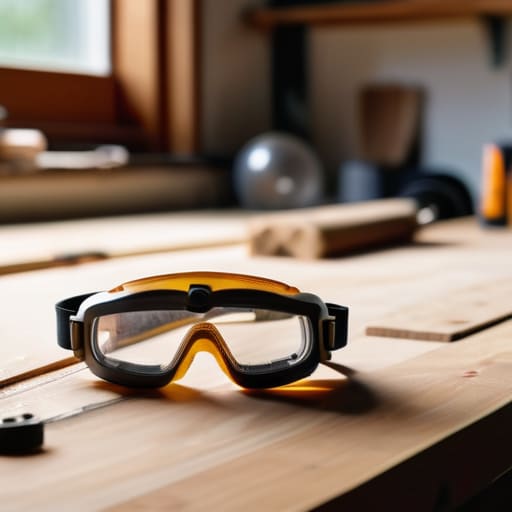
Look, I know the temptation to just dive in and start making holes, but let’s be real: a drill is a powerful tool, and it doesn’t care if you’re in a rush. Before you even pull the trigger, take a second to check your surroundings. Make sure your workspace is clear of clutter—nothing ruins a project faster than tripping over a stray power cord or a pile of scrap wood. I always make it a point to wear eye protection, even if I’m just doing something small like hanging a picture. It’s not about being paranoid; it’s about preventing a flying splinter from ruining your afternoon.
Another thing that trips people up is the difference between materials. If you’re jumping from drilling into wood vs metal, you can’t use the same mindless pressure for both. Wood is forgiving, but metal requires a slower, more controlled approach to avoid slipping. Also, pay attention to your settings. If you’re working on something delicate, don’t ignore the importance of adjusting drill torque settings to prevent stripping your screws. It’s much easier to slow down for five seconds now than it is to fix a stripped-out hole later. Stay steady, stay focused, and respect the tool.
A few things I wish I knew before my first DIY project
- Don’t overthink the bit selection; if you’re drilling into wood, use a twist bit, but if you’re hitting a wall, you’ll need a masonry bit or you’re just going to ruin your battery.
- Always start with a pilot hole—it’s a tiny extra step that prevents your wood from splitting and keeps you from having to start the whole project over.
- Watch your pressure; it’s tempting to lean into it when things feel stuck, but usually, you just need to let the tool do the work rather than forcing it.
- Keep your workspace clear of the little things, especially sawdust and wood shavings, because they tend to migrate into your drill’s vents if you aren’t careful.
- Check your battery level before you get into a rhythm; there is nothing more frustrating than being halfway through a task and having the drill die on you.
The "Keep It Simple" Summary
Forget about being a master carpenter; just focus on a steady grip, a clear workspace, and making sure you aren’t rushing the bit into the material.
Safety isn’t about following a manual word-for-word, it’s about the small habits—like wearing eye protection and checking your battery—that keep a quick DIY project from turning into a disaster.
Don’t sweat the expensive toolkits; a basic cordless drill and a few repeatable steps are all you really need to get the job done without the unnecessary fluff.
## The real secret to a good DIY job
“Forget the idea that you need a professional-grade setup to get things done; a drill isn’t a magic wand, it’s just a tool that rewards a steady hand and a bit of patience over sheer force.”
Nadia Halloway
Real Progress Over Perfection
Look, we’ve covered a lot, from the basic mechanics of driving a screw to the actual, slightly terrifying reality of keeping your hands steady and your workspace safe. If you remember nothing else, just remember that you don’t need a professional workshop to get things done. You just need to know how to hold the tool, respect the power it has, and follow a consistent rhythm. Whether you’re mounting a shelf in a tiny apartment or fixing a loose hinge on a thrifted mid-century dresser, the goal isn’t to become a master carpenter overnight. It’s about having the right basic systems in place so that when you pick up that drill, you feel capable rather than overwhelmed.
At the end of the day, I know that staring at a pile of tools can feel a bit intimidating, especially if you didn’t grow up with a toolbox in your hand. But please, don’t let the fear of making a crooked hole stop you from actually building something. The most important part of DIY isn’t having a flawless finished product; it’s the fact that you actually did it yourself. Mistakes happen—I’ve certainly filled more holes with wood filler than I care to admit—but those little hiccups are just part of the process. So, grab your drill, take a deep breath, and just start making one steady hole at a time.
Frequently Asked Questions
How do I know which drill bit to use so I don't ruin my furniture?
I’ve definitely learned this the hard way while restoring old thrift store finds. The golden rule? Match the bit to the material, not the drill. For wood, grab a twist bit—they’re designed to slice through fibers cleanly. If you’re hitting metal, you need a high-speed steel bit so you don’t burn it out. And please, avoid using a masonry bit on your furniture unless you want a very expensive pile of sawdust.
Is there a way to drill into a wall without it cracking or making a massive mess?
Honestly, the “dust explosion” is the worst part of any DIY project. To keep your walls from cracking and your floor from looking like a construction site, start by sticking a post-it note right under where you’re drilling—fold it into a little pocket to catch the debris. If it’s drywall, use a masonry bit only if you absolutely have to, and go slow. Don’t force it; let the tool do the heavy lifting.
What's the difference between a driver and a drill, and do I actually need both?
Honestly, the terminology gets confusing fast, but here’s the lowdown: a drill is for making holes, while a driver is built for driving screws. Drivers are usually more compact and have more control to prevent stripping your screw heads. If you’re just starting out, one versatile cordless drill/driver combo is plenty. Don’t go out and buy a whole toolkit yet; just get one solid tool that does both and master it first.
How do I keep the drill from slipping when I'm trying to hit a specific spot?
I’ve definitely been there—staring at a tiny mark and praying the bit doesn’t wander off. My trick? Don’t trust your eyes alone. Use a nail or a center punch to make a tiny physical divot right where you want to go. It gives the bit a “home” to sit in. Also, try using your non-dominant hand to steady the guide or even just a piece of painter’s tape to mark the spot.
