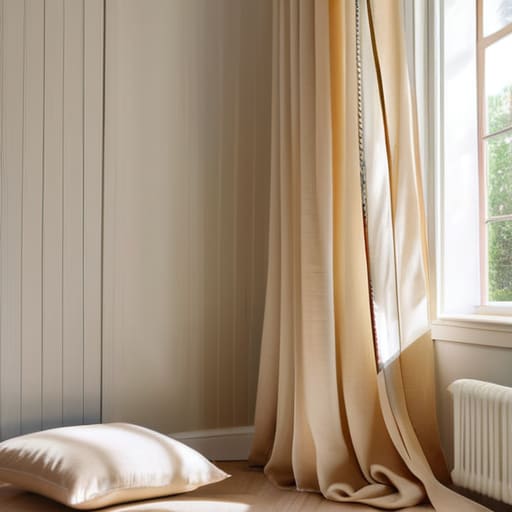
How to Make Custom Curtains Without a Sewing Machine
I was sitting on my floor three years ago, surrounded by expensive fabric scraps and a sewing machine that felt more like a weapon than a tool, staring at a window that let in way too much morning light. I had spent half my paycheck on “designer” linen, convinced that if I could just master the perfect hem, my apartment would finally feel like an adult lived there. But here’s the truth about diy curtains: you don’t need a degree in textile design or a studio full of high-end equipment to make your space feel finished. Most of the tutorials online are just aesthetic productivity traps—they show you a flawless, sun-drenched living room that looks great on camera but is a nightmare to actually maintain.
I’m not going to ask you to spend your entire weekend chasing a Pinterest-perfect drape that requires professional tailoring. Instead, I want to show you a few low-stakes systems for creating diy curtains that actually work for real, messy lives. We’re going to focus on simple hanging methods, smart fabric choices that won’t break your budget, and ways to get the job done without the stress. Let’s just get some privacy and a bit of style into your room so you can get back to the things that actually matter.
Guide Overview
Tools & Supplies
- Fabric scissors for clean cutting
- Sewing machine for stitching hems
- Measuring tape for accurate sizing
- Pins or clips to hold fabric in place
- Iron to press seams and hems
- Fabric (2-3 yards depending on window size)
- Thread (1 spool matching fabric color)
- Curtain tape or header tape (1 roll)
- Measuring tape (1 unit)
Step-by-Step Instructions
- 1. First, let’s talk measurements, because this is where most people mess up and end up with curtains that look like they’re wearing high-water pants. Grab a metal measuring tape—not a sewing one, they’re too flimsy—and measure your window width and height. I always recommend adding about six inches of extra width on each side so the fabric actually covers the window frame rather than just hovering awkwardly in the middle.
- 2. Next, go hunting for your fabric. Since we aren’t trying to win any interior design awards here, don’t feel pressured to buy expensive linen. Check your local thrift store or look for heavy cotton drop cloths at the hardware store. The goal is to find something with a decent weight that will actually hang straight without being so stiff it feels like you’re decorating with cardboard.
- 3. Once you have your fabric, you need to prep it. If you’re like me and didn’t get everything laundered before it hit the thrift store, throw it in the wash on a warm cycle and dry it. You want to account for shrinkage now, rather than realizing your curtains are two inches too short after you’ve already sewn them.
- 4. Now, let’s get to the “cutting” part. Lay your fabric flat on the floor (make sure it’s clean!) and use tailor’s chalk or even a regular pencil to mark your lines. You’ll want to leave about an extra inch or two of “seam allowance” at the sides and the bottom. It’s much better to cut too much and trim it down later than to realize you’ve cut it too short and have to start over.
- 5. If you have a sewing machine, great; if you don’t, a needle and thread will work, though your hands might get a little tired. I prefer a simple “double fold” hem. This means you fold the edge over once, then fold it over a second time to hide the raw, messy edge of the fabric inside. It makes the finished product look intentional rather than just a scrap of cloth.
- 6. For the top of the curtain, we’re skipping the complicated rod pockets that require perfect tension. Instead, I’m a huge fan of using clip rings. You just hem the top of the fabric into a clean, straight line, and then you literally just clip the rings onto it. It’s a massive time-saver and makes it incredibly easy to slide them open when you actually want to see outside.
- 7. Finally, hang them up and do a quick “stress test.” Pull them shut and open them a few times to make sure the clips are secure and the fabric isn’t catching on anything. If they look a little wonky, don’t sweat it. The point isn’t perfection; it’s about having a functional system that makes your space feel a little more like home without breaking the bank.
Smart Fabric Selection for Curtains That Handle Real Life

Look, I get it. You’re scrolling through Pinterest and seeing these heavy, floor-to-ceiling velvet drapes that look incredible in a staged living room. But unless you’re prepared to spend your entire Sunday vacuuming dust out of deep pile fabric, let’s be real: that’s not a sustainable choice for a busy home. When you’re diving into fabric selection for curtains, my rule of thumb is to prioritize durability and light management over pure aesthetics. If you have pets or kids, skip the delicate linens that wrinkle if you even look at them wrong, and opt for a sturdy cotton blend or a synthetic weave that can handle a bit of a beating.
You also don’t need to go overboard with expensive, custom window treatments to make a difference. If you’re on a budget—which, let’s face it, most of us are—focus on how the fabric interacts with your light. A thicker weave provides privacy and blocks out that annoying morning sun, while a lighter fabric keeps things airy. If you’re worried about the sewing part, don’t sweat it. You can use hem tape for curtains to get a clean edge without actually touching a sewing machine. It’s a small, repeatable win that makes your DIY project look intentional rather than rushed.
Using Hem Tape for Curtains Without the Sewing Stress
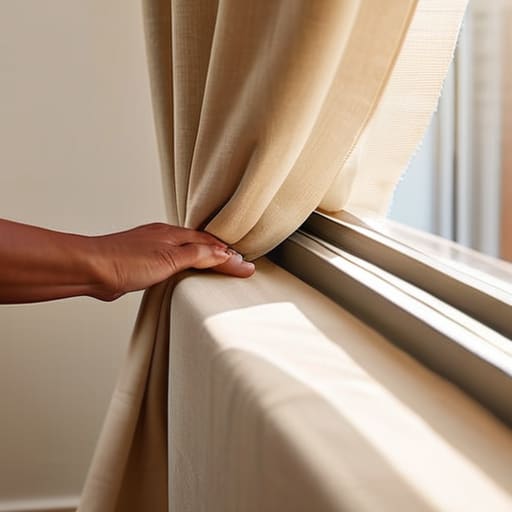
If the thought of sitting down with a needle and thread makes you want to close your laptop and walk away, I hear you. I really do. I spent years thinking I needed to master tailoring just to get decent window dressing styles in my apartment, but honestly? That was a massive waste of my limited free time. Using hem tape for curtains is the ultimate shortcut for anyone who wants the look of custom window treatments without the actual labor. It’s basically a “set it and forget it” system that works even when you’re feeling completely unmotivated.
The trick to making this look intentional rather than “I did this in ten minutes” is all in the prep. Before you even touch the tape, make sure your fabric is ironed flat. If you’re working with something heavy, use a bit of extra weight to hold the fold in place while you iron the tape into the seam. I always tell my clients that consistency is better than perfection; even if the hem isn’t mathematically perfect to the millimeter, as long as it’s straight and even, no one is going to notice once you start hanging curtain rods and letting the light hit the room. It’s a small, repeatable win that makes a huge difference.
Five ways to keep your DIY curtains from becoming a total headache
- Don’t obsess over the perfect drape. If the fabric hangs a little wonky or isn’t perfectly symmetrical, just leave it. The goal is privacy and light control, not a showroom floor.
- Test your hardware on a scrap piece of fabric first. I’ve wasted way too much time trying to hang heavy linen on flimsy rods that ended up bowing in the middle like a sad noodle.
- If you’re using hem tape, give it a quick steam with an iron once it’s set. It helps the bond really take hold so you aren’t re-doing the whole thing two weeks later when you actually start using them.
- Measure twice, but don’t overthink the math. If you’re between two lengths, go with the longer one. You can always tuck extra fabric behind the rod, but you can’t magically add length if they’re too short.
- Buy more fabric than you think you need. Between mistakes, uneven cuts, or just wanting a little extra “scrunch” at the top, that extra yard of fabric is much cheaper than a trip back to the store mid-project.
The Low-Maintenance Curtain Cheat Sheet
Stop overthinking the “perfect” fabric; just pick something durable that won’t make you panic the first time you accidentally spill coffee on it.
Skip the sewing machine if it stresses you out—hem tape is a total lifesaver for getting a clean look without the headache.
Focus on function over Pinterest-perfection; the goal is a window that looks decent and gives you some privacy, not a museum exhibit.
The Real Goal of DIY Decor
“Your home shouldn’t feel like a museum where you’re afraid to touch anything; it should feel like a place where you can actually breathe, even if your DIY curtains are a little crooked.”
Nadia Halloway
Making It Work in Your Space
At the end of the day, we didn’t aim for runway-ready drapery; we aimed for something that actually functions in your home. By choosing a fabric that can handle a bit of dust and using hem tape to skip the sewing machine headache, you’ve built a system that works for you rather than against you. Remember, the goal was to find a way to manage your light and privacy without spending a fortune or losing an entire weekend to a craft project that leaves you more stressed than when you started. It’s all about those small, repeatable wins that make a room feel finished without the unnecessary complexity.
If your edges aren’t perfectly straight or the fabric hangs a little wonky, please, just let it go. Your home is meant to be lived in, not curated for a silent audience of strangers on the internet. These curtains are a tool to help you reclaim your space, and they don’t have to be perfect to be effective. I’ve learned through years of working in cramped apartments that progress beats perfection every single time. So, hang them up, grab a coffee, and enjoy the fact that you just actually got something done today.
Frequently Asked Questions
How do I figure out how much fabric I actually need without overspending at the store?
The biggest mistake I see is people buying way too much “just in case.” To avoid that, measure your window width first, then double it. That extra width gives you those nice, soft folds instead of a flat, cheap-looking sheet. Once you have that number, multiply it by your desired length. Don’t forget to add an extra 10% for hems. Grab a measuring tape before you leave the house—it’ll save you a frantic second trip.
Can I use these DIY curtains if I have a heavy-duty blackout rod, or will the hem tape fail?
Honestly, that’s a great question. If you’re using a heavy-duty blackout rod, you’re dealing with more weight and more tension. Hem tape is a lifesaver for most things, but it can struggle with super heavy fabrics or rods that pull hard on the material. If your curtains feel like they weigh a ton, I’d skip the tape and just do a quick machine stitch. It’s ten minutes of work that saves you a massive headache later.
What's the best way to clean these once they inevitably collect dust or pet hair?
Let’s be real: if you have pets or a dusty apartment, these are going to need some love sooner than you think. For a quick fix, just run a lint roller over them—it’s a lifesaver for pet hair. If they’re looking a bit grim, skip the heavy machine wash unless the fabric tag says it’s okay. Honestly, a quick vacuum with a brush attachment is usually enough to keep them looking decent without the stress.
How do I make sure they don't look "cheap" or lopsided once they're actually hanging up?
The “cheap” look usually comes from one thing: unevenness. If your hem tape isn’t straight, the whole window looks wonky. My trick? Use a level or a laser level—even a phone app works—to mark your line before you stick anything down. Also, don’t skimp on the weight. If the fabric is too flimsy, it’ll ripple weirdly. Aim for a decent drape; a little heft makes even a DIY job look intentional and high-end.
