An Introduction to Diy Jewelry Making
I was sitting on my floor last Tuesday, surrounded by a chaotic mountain of tangled silver wire, tiny bead trays that had spilled everywhere, and a mounting sense of frustration. I had just spent forty dollars on a “starter kit” that promised professional results, but all it really gave me was a headache and a pile of expensive junk. That’s the problem with most of the advice you see online about diy jewelry making; it’s always wrapped in this polished, aesthetic dream of perfectly organized studios and high-end gemstones. The truth is, most of those tutorials are completely unsustainable for anyone with a real life, a small apartment, or a budget that actually needs to cover rent.
I’m not going to tell you that you need a dedicated craft room or a thousand-dollar bead organizer to get started. Instead, I want to show you how to build a functional system that works even when your kitchen table is covered in mail. This guide is about the uncomplicated basics of diy jewelry making—the tools you actually need, the cheap supplies that don’t suck, and how to keep your workspace from becoming a permanent disaster zone. We’re skipping the fluff and focusing on making things that actually look good without the burnout.
Guide Overview
Tools & Supplies
- Needle-nose pliers for gripping and bending wire
- Wire cutters for trimming metal and cord
- Beading mat to prevent rolling
- Assorted beads (approx. 50-100 pieces)
- Jewelry wire or elastic cord (1-2 meters)
- Lobster clasps (2 pieces)
- Jump rings (10-20 pieces)
Step-by-Step Instructions
- 1. First things first, clear off a spot on your table that isn’t covered in mail or coffee mugs. You don’t need a fancy studio; a small tray or even a flat plate works perfectly to stop your tiny beads from rolling away into the abyss. Having a defined workspace is the easiest way to keep the mess from feeling overwhelming.
- 2. Grab your basic toolkit, but please, don’t go out and buy a professional jeweler’s bench just yet. You really only need three things to start: needle-nose pliers, wire cutters, and a pair of round-nose pliers. If you can find these at a local thrift store or in a junk drawer, you are officially ready to go.
- 3. Pick a simple design pattern before you touch a single bead. I always tell people to start with something linear, like a simple beaded bracelet or a minimalist pendant. If you try to tackle a complex multi-strand necklace on your first try, you’ll likely end up frustrated and unmotivated before you even finish the first loop.
- 4. Lay out your components in small, organized piles. I’m a huge fan of using old egg cartons or even muffin tins to sort your beads by color or size. It keeps everything visible and prevents that frantic “where did I put that tiny clasp?” feeling that usually happens mid-project.
- 5. Start stringing your materials, but remember to leave some “breathing room.” If you’re using elastic cord, don’t pull it too tight immediately; give it a little stretch first so the jewelry doesn’t snap the first time you put it on. It’s all about building a system that lasts rather than something that looks good for five minutes.
- 6. Secure your ends with a sturdy knot or a crimp bead. If you’re using wire, double-knotting is your best friend, but make sure you add a tiny drop of clear nail polish or jewelry glue to the knot. This is the “small, repeatable system” part—it’s a tiny extra step that prevents a total disaster later on.
- 7. Once you’re done, don’t just toss the pieces in a pile. Find a small dish or a dedicated hook to hang them on. Seeing your finished work in a designated spot gives you a little hit of dopamine and reminds you that you actually built something with your own two hands.
Essential Bead Supplies That Actually Make Sense
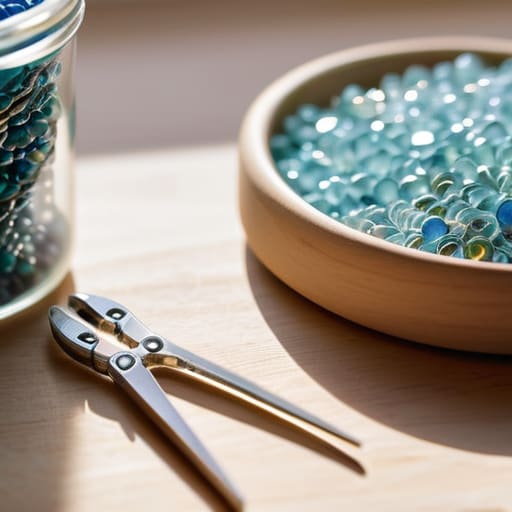
Look, when you first start browsing craft sites, it’s easy to feel like you need a literal warehouse of supplies to be “legit.” You see these massive kits with fifty different types of pliers and enough beads to sink a ship, and suddenly, you’re staring at a shopping cart that’s way too expensive. Trust me, I’ve been there, and it’s the fastest way to kill your momentum. You don’t need a professional studio; you just need a few essential bead supplies that won’t gather dust in a drawer. Start with a decent variety of glass seed beads, some sturdy nylon cord, and a handful of metal spacers. These are the building blocks that let you experiment with different jewelry design ideas without breaking the bank.
As for the hardware, don’t go overboard on the specialized gear. If you’re looking for jewelry making tools for beginners, stick to a basic trio: needle-nose pliers, wire cutters, and round-nose pliers. That’s it. These three will get you through almost anything, from crafting handmade earrings to assembling a simple beaded bracelet. I always tell my clients that the best system is one you can actually afford to maintain. Buy small quantities of different colors first. Once you find a combination that you actually love wearing, then you can invest in the bulk packs.
Low Stress Jewelry Making Tools for Beginners
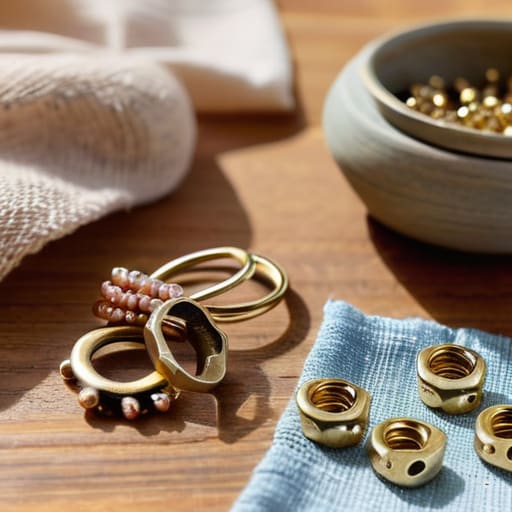
Look, I know the temptation to head straight to a craft store and grab every shiny, expensive-looking kit on the shelf. But if you’re anything like me, you probably have a tiny desk or a kitchen table that needs to be cleared by dinner. You don’t need a dedicated studio to start crafting handmade earrings or simple bracelets. Honestly, the biggest mistake I see is people overcomplicating their setup before they’ve even finished their first piece.
Start with a basic trio of pliers—round nose, chain nose, and a wire cutter. That’s it. You can do an incredible amount of work with just those three. If you want to level up later, you can experiment with more complex wire wrapping techniques, but don’t let that stop you from starting today. My best advice? Get a small, magnetic tray or even just a shallow ceramic bowl to keep your components from rolling off the table and disappearing into the abyss of your rug. It’s a tiny system that saves a massive amount of frustration when you’re trying to focus on your design rather than hunting for a lost bead under the sofa.
5 Ways to Keep the Craft from Taking Over Your Life
- Stop the “supply creep” by setting a strict boundary on what you buy. It’s tempting to grab every pretty bead you see at the craft store, but unless it fits into a specific project you’ve already planned, leave it on the shelf. Your workspace (and your bank account) will thank you.
- Create a “reset ritual” for your station. I can’t stand finishing a project only to find my desk covered in tiny metal bits and loose thread. Spend just five minutes at the end of a session putting everything back in its designated bin. It makes starting the next time feel like a breeze instead of a chore.
- Don’t get hung up on perfection in your first few pieces. If a knot looks a little wonky or a clasp is slightly off-center, just keep moving. The goal is to build the habit of creating, not to produce museum-quality pieces on day one.
- Use clear, stackable containers for your beads. I learned this the hard way when I spent forty minutes digging through a junk drawer for a specific shade of turquoise. If you can’t see it, you won’t use it, and you’ll end up buying duplicates.
- Work in small, manageable chunks. Instead of trying to spend an entire Saturday marathon-making, try doing one bracelet while you’re listening to a podcast or waiting for your coffee to brew. It keeps the hobby feeling like a way to unwind rather than another item on your to-do list.
The Bottom Line: Keeping it Real
Don’t get caught in the “gear trap”—you don’t need a professional studio to make something beautiful, just a few reliable tools and a dedicated corner of your table.
Start with small batches of beads rather than buying massive, expensive kits that will just end up cluttering your space and your budget.
Focus on the process, not the perfection; if a design isn’t working, just take it apart and try again when you have more headspace.
Forget the Perfectionism
“Stop scrolling through those perfectly curated jewelry tutorials that make you feel like you need a professional studio just to make a pair of earrings. Jewelry making shouldn’t be another high-maintenance hobby on your to-do list; it’s just about finding a rhythm with what you have and making something that feels like you.”
Nadia Halloway
Keep It Simple, Keep It Moving
Look, I know how easy it is to get lost in the rabbit hole of specialty pliers and those massive, expensive bead kits that promise professional results. But if we’ve learned anything today, it’s that you don’t need a studio or a massive budget to start creating. By sticking to a few essential, versatile tools and focusing on quality beads that actually work with what you already have, you’ve already bypassed the biggest hurdle. You’ve built a foundation that isn’t about perfection, but about functional creativity—the kind that actually fits into your real, busy life without turning your kitchen table into a permanent disaster zone.
At the end of the day, your jewelry doesn’t have to be a masterpiece to be meaningful. Don’t let the fear of a “bad” design stop you from even trying. The goal here isn’t to launch a high-end boutique; it’s to find a little pocket of peace in a world that’s constantly demanding more of your time. Just grab your pliers, pick a pattern that feels good, and start making something. Even if it’s just a simple bracelet for yourself, you’re proving that you can build something beautiful from scratch, even when life feels a little messy.
Frequently Asked Questions
How do I stop myself from spending a fortune on beads every time I get a new idea?
Honestly? Stop treating every spark of inspiration like a mandate to shop. I used to do the same thing—buying entire color palettes for a project I hadn’t even sketched out yet. Now, I use the “One-In, One-Out” rule. Before I hit ‘checkout’ on those gorgeous glass beads, I have to look at my current stash and decide what’s actually going to get used. If it’s just a “maybe,” let it go.
Is there a way to organize all these tiny pieces without losing my mind (or my sanity)?
Look, I get it. I spent my childhood navigating tiny apartments, so I know the panic of a “tiny object explosion.” Please, don’t go buying those massive, expensive specialized jewelry cabinets yet. Instead, grab a cheap multi-compartment tackle box or even those clear plastic craft organizers from the dollar store. The trick is visibility. If you can’t see the bead, you’ll forget you own it. Keep it small, keep it clear, and keep it reachable.
How can I tell if the metal I'm using is actually going to turn my skin green in a week?
The short answer? Check the label for “nickel-free” or look for “sterling silver” and “gold-filled.” If it’s just “gold-toned” or “silver-colored,” it’s likely a base metal like brass or copper with a thin coating. Those coatings wear off fast, and that’s when the green skin happens. Honestly, if you’re unsure and can’t find a stamp, skip it. It’s not worth the irritation or the ruined outfit.
What do I do when a project feels like it's taking way too long and I just want to quit?
Look, I get it. I’ve been there, staring at a half-finished project and feeling like I’m just spinning my wheels. When that “I want to quit” feeling hits, stop trying to power through. Instead, shrink the goal. Don’t try to finish the whole necklace; just commit to stringing five beads. If that still feels heavy, walk away. Put the tools in a drawer and come back tomorrow. Systems work better when they aren’t fueled by burnout.