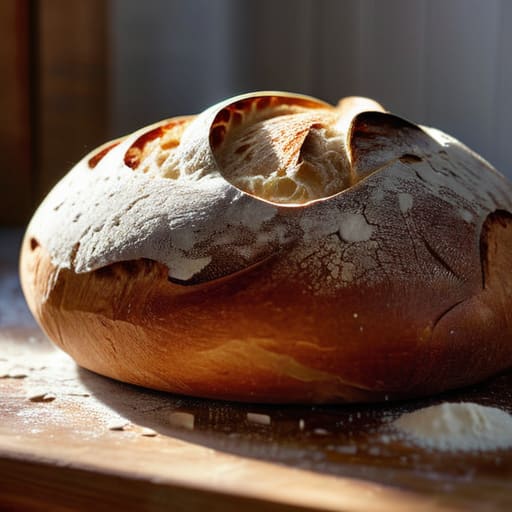
Homemade Bread Made Simple (no Special Tools Required)
I was staring at a countertop covered in a literal mountain of flour, my kitchen looking like a disaster zone, and a loaf of dough that had the consistency of wet cement. I had spent three hours following a “beginner” tutorial that required a professional-grade proofing basket and a specialized stone oven, and all I had to show for it was a massive mess and a sense of total failure. If you’ve ever felt like you need a culinary degree just to figure out how to bake bread at home, I promise you’ve been lied to. You don’t need a Pinterest-perfect kitchen or a collection of expensive gadgets to get a decent crust; you just need a system that actually works when your life is already chaotic.
In this guide, I’m stripping away the fluff and the intimidating jargon to give you a realistic, repeatable method for making bread. We aren’t aiming for “Instagram-worthy” sourdough sculptures that take three days of constant attention; we’re focusing on simple, reliable steps that fit into a busy schedule. I’ll show you how to manage the dough without losing your mind, even if your kitchen is cramped and your schedule is a wreck. Let’s get to the stuff that actually matters.
Guide Overview
Tools & Supplies
- Mixing bowl for combining ingredients
- Oven for baking the loaf
- Measuring cups and spoons for precision
- All-purpose or bread flour 500g
- Warm water 350ml
- Active dry yeast 7g
- Salt 10g
Step-by-Step Instructions
- 1. First things first, clear a decent amount of counter space. You don’t need a professional marble station, but you do need a clean area where you won’t knock over your coffee. Grab a large mixing bowl, some flour (all-purpose is fine, don’t stress about the fancy bread flour right now), yeast, salt, and lukewarm water. The key here is to not overcomplicate the ingredients; we’re looking for a basic ratio that works every single time.
- 2. Mix your dry ingredients in the bowl, then pour in the water. Use a sturdy spoon or just your hands to bring it all together into a shaggy, somewhat unappealing mess. If it feels like a gluey disaster, that’s actually normal. Don’t go grabbing extra flour immediately—just give it a minute to hydrate before you decide it’s a failure.
- 3. Now comes the part most people skip because they think it’s too much work: kneading. Turn the dough out onto a lightly floured surface and push, fold, and turn. Do this for about 8 to 10 minutes until the dough feels smooth and elastic rather than sticky and lumpy. It’s a great way to burn off a little steam, and honestly, it’s a satisfyingly tactile break from staring at a screen.
- 4. Lightly oil your bowl, plop the dough back in, and cover it with a clean kitchen towel. Now, you wait. This is where the “aesthetic productivity” crowd tells you to time it perfectly, but I say just let it sit in a warm spot until it has roughly doubled in size. This usually takes an hour or two, so use this time to actually do something else—tackle your inbox or finally fix that loose cabinet handle.
- 5. Once the dough has puffed up, gently punch it down to let the air out. This isn’t about being aggressive; it’s just about resetting the structure. Shape it into a rough ball or a log, depending on what kind of pot you’re using, and place it on a piece of parchment paper. If you have a Dutch oven, this is where the magic happens, but a regular baking sheet works too if you’re keeping things low-maintenance.
- 6. Preheat your oven to around 450°F (230°C). If you’re using a Dutch oven, let it get screaming hot inside the oven for at least 20 minutes. Carefully drop your dough into the hot pot, put the lid on, and bake for about 30 minutes. The lid traps the steam, which is the secret to a decent crust without needing a professional steam oven.
- 7. Take the lid off for the last 10-15 minutes to let the crust get that deep, golden-brown color we all want. When you pull it out, it should sound hollow when you tap the bottom. Now, the hardest part: resist the urge to slice it immediately. If you cut into it while it’s still steaming, you’ll ruin the texture inside. Let it cool on a rack for at least half an hour so the structure can actually set.
Essential Bread Making Equipment for Beginners Without the Clutter
Look, I know the internet loves to tell you that you need a $500 stand mixer and a dedicated marble slab to make decent loaves, but my tiny kitchen (and my bank account) begs to differ. You don’t need a specialized pantry full of gadgets to master artisan bread baking at home. Honestly, if you have a large mixing bowl, a sturdy spatula, and a kitchen scale, you’re already halfway there. I’ve learned the hard way that measuring by volume with those little plastic cups is a recipe for disaster; a cheap digital scale is the single best investment you can make to ensure your ratios are actually consistent.
As for the heavy lifting, don’t feel pressured to buy fancy proofing baskets or linen cloths right away. A simple bowl lined with a clean, well-floured tea towel works perfectly for your proofing bread tips—it keeps the dough from sticking without adding more clutter to your cabinets. If you’re worried about the physical side of things, don’t stress about mastering complex kneading dough techniques immediately. Even if you just use your hands to fold the dough a few times, you’ll get the job done. The goal isn’t to have a professional bakery setup; it’s to have a functional toolkit that doesn’t take up your entire countertop.
Choosing the Right Flour Types for Bread Making That Actually Work
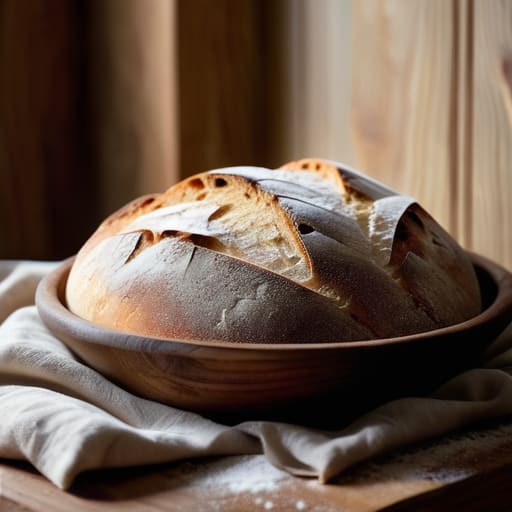
Look, you don’t need a pantry full of specialty grains to get decent results. When I first started, I thought I had to hunt down rare, stone-ground heritage flours just to feel like a “real” baker. In reality, most of that is just noise. If you want to keep things simple and low-clutter, start with a solid all-purpose flour or a high-quality bread flour. The main difference is the protein content; bread flour has more of it, which gives your loaf that structure and chew we’re all looking for.
If you’re feeling experimental, you can dabble with whole wheat, but treat it as a supplement rather than the whole foundation. Mixing a bit of whole wheat into your white flour adds flavor and nutrients without making your loaf feel like a brick. This is crucial because the wrong ratio can totally mess with the yeast fermentation process, leaving you with a dense, heavy mess instead of something airy.
My rule of thumb? Don’t overcomplicate your flour types for bread making until you’ve mastered the basics with something reliable. Once you’ve got a repeatable rhythm down, then you can start playing with the fancy stuff. For now, just grab a bag of decent bread flour and focus on the consistency of your dough.
Five ways to stop overcomplicating your bake
- Stop obsessing over the scale. If you don’t have a digital scale, just use a consistent measuring cup, but whatever you do, don’t switch back and forth between them mid-recipe. Consistency is the only thing that matters when you’re trying to figure out your dough’s hydration.
- Embrace the “ugly” stage. Your dough is going to look like a sticky, unappealing blob at some point, and that’s fine. Don’t panic and dump more flour on it just because it looks messy; that’s how you end up with a brick instead of a loaf.
- Let the room do the work. I know it’s tempting to put your dough in a warm oven to make it rise faster, but honestly? Just find a corner of your counter and leave it alone. Natural rising is more predictable and way less stressful.
- Forgive your first few failures. Your first loaf might be a little dense or a bit too salty, and that’s okay. I’ve definitely ruined more loaves than I’ve perfected, but each “fail” is just data telling you how to tweak your system for next time.
- Clean as you go (or at least, as much as you can). There is nothing worse than finishing a successful bake only to realize you have a mountain of sticky flour and dough crusts to scrub. Wash your bowl while the dough is resting; your future, tired self will thank you.
The "no-stress" bread summary
Skip the expensive gadgets; you really just need a heavy pot, a bowl, and a bit of patience to get great results.
Don’t get hung up on finding the “perfect” flour—just pick something reliable and stick to a routine you can actually maintain.
Focus on building a repeatable rhythm rather than chasing a perfect loaf; it’s better to have a decent loaf every week than a masterpiece once a year.
## The reality of the kitchen counter
“Stop waiting for the perfect, Pinterest-worthy kitchen setup to start baking; bread doesn’t care if your counters are cluttered or if you’re using a chipped bowl, it just needs a little flour, some patience, and a system that doesn’t make you want to quit by Tuesday.”
Nadia Halloway
The Messy Truth About Your First Loaf
At the end of the day, baking bread isn’t about mastering some complex chemistry equation or owning a professional-grade proofing basket. It’s about having a few reliable tools, the right flour, and a routine that doesn’t make you want to throw your apron across the room. We’ve covered the essentials: keeping your gear minimal, picking flour that actually does the heavy lifting, and following a process that fits into your actual life. Remember, if your dough looks a little weird or your crust isn’t perfectly golden, it’s not a failure; it’s just part of the learning curve. You don’t need a Pinterest-perfect kitchen to make something delicious; you just need a repeatable system that works when you’re tired and the kitchen is a disaster.
So, please, don’t let the fear of a sunken loaf stop you from even trying. The goal here isn’t to become a master boulanger overnight; it’s to find a little bit of rhythm in the chaos of your daily routine. There is something incredibly grounding about the smell of fresh bread filling a small apartment, especially when you know you made it from scratch with nothing but flour, water, and a bit of patience. Stop waiting for the perfect moment or the perfect setup. Just grab a bowl, get your hands a little floury, and start where you are. You’ve got this.
Frequently Asked Questions
My dough isn't rising at all—did I kill the yeast or is my kitchen just too cold?
First, take a deep breath—your bread isn’t a lost cause. It’s usually one of two things: temperature or a dead yeast. If your kitchen feels like a walk-in fridge, the yeast is likely just hibernating. Try moving your bowl to a slightly warmer spot, like near a turned-off oven. But if you used hot water to mix it, you might have accidentally cooked the yeast. Next time, keep it lukewarm. Let’s troubleshoot.
Do I really need to buy those expensive proofing baskets, or can I just use a bowl and a towel?
Short answer? Absolutely not. Please, save your money for better flour. Those fancy rattan bannetons look great on Instagram, but they aren’t magic. A regular mixing bowl lined with a clean, well-floured kitchen towel works just fine. The goal is to give the dough structure and prevent it from spreading too much, not to collect more specialized gear that just sits in your cupboard. Let’s keep it simple and clutter-free.
How do I know when the bread is actually done without cutting into it and ruining the texture?
The “tap test” is your best friend here. When you think it’s ready, carefully lift the loaf (careful, it’s hot!) and give the bottom a firm tap with your knuckles. You’re looking for a hollow, drum-like sound. If it thuds, it’s still gummy inside. Also, keep an eye on the color; you want a deep, golden crust, not a pale, sad-looking loaf. If it looks right and sounds hollow, trust your gut.
I hate wasting food; how can I save or use up leftover dough if I make too much?
Look, I’m all about minimizing waste, so throwing away dough feels like a personal failure. If you’ve got leftovers, don’t panic. The easiest move? Portion it into small balls, freeze them in airtight bags, and grab them whenever you need a quick pizza crust or flatbread. If you’ve got a little more time, just let it ferment in the fridge for a few days—it actually develops more flavor that way.
