
The Two-minute Fix for a Squeaky Door
I was halfway through a much-needed caffeine fix last Tuesday when that piercing, metallic screech echoed through my apartment for the tenth time that morning. It was my bedroom door, acting like a tiny, uninvited alarm clock every single time I moved. Most people will tell you that you need to head straight to the hardware store for specialized industrial lubricants or some expensive multi-tool kit, but honestly? That is a total waste of time and money. Learning how to fix a squeaky door doesn’t require a massive home improvement budget or a degree in engineering; usually, it just takes a bit of common sense and something you already have in your kitchen or junk drawer.
I’m not about to give you a twenty-step manual that assumes you have a workshop in your living room. Instead, I’m going to show you the no-fuss methods that actually work when you just want the noise to stop so you can focus on your day. We’re going to skip the jargon and the overpriced gadgets to focus on quick, repeatable fixes that get the job done in under five minutes. Let’s get your home quiet again without the unnecessary drama.
Guide Overview
Tools & Supplies
- Screwdriver (to tighten loose hinge screws)
- Rag or paper towel (to wipe away excess lubricant)
- Lubricant (WD-40, silicone spray, or white lithium grease)
- Graphite powder or petroleum jelly (alternative household options)
Step-by-Step Instructions
- 1. First, let’s figure out if this is a quick fix or a “get the tools out” situation. Open and close the door a few times to pinpoint exactly where the noise is coming from. Most of the time, it’s just the metal hinges rubbing together because they’re dry, but if the door is scraping against the floor or the frame, you might have a bigger alignment issue on your hands.
- 2. Grab whatever lubricant you have lying around. If you have a can of WD-40, that works in a pinch, but honestly, it can be a bit messy and temporary. If you want something that actually lasts, I’d recommend a silicone spray or even a little bit of white lithium grease. If you’re in a total bind and don’t want to run to the store, a tiny drop of cooking oil on a paper towel can get you through the night.
- 3. Apply the lubricant directly to the top of the hinge pins. You don’t need to douse the whole thing—just a small amount will do. Slowly move the door back and forth to help the oil seep down into the joints. It’s a bit of a process, but you want that liquid to travel as deep as possible to reach the friction points.
- 4. If the squeak is being stubborn and won’t quit, you’re going to have to go old-school and pull the pins. Take a hammer and a large nail (or even a sturdy screwdriver) and gently tap the bottom of the hinge pin upward until it pops out. Be careful not to go too fast; you don’t want to dent the metal or scratch your door frame.
- 5. Once the pins are out, wipe them down with a rag to get rid of any old, crusty gunk or rust. This is the part most people skip, but it’s actually the most important step for a long-term fix. Once they’re clean, coat the pin in a thin layer of grease or even some petroleum jelly before sliding it back into place.
- 6. Tap the pins back in carefully and give the door a few good swings. If you hear a tiny bit of movement, don’t panic—just give it another round of lubrication. Wipe away any excess oil immediately with a paper towel so you don’t end up with dark stains on your door or floor later on.
The Real Debate Wd 40 vs Silicone Spray for Doors
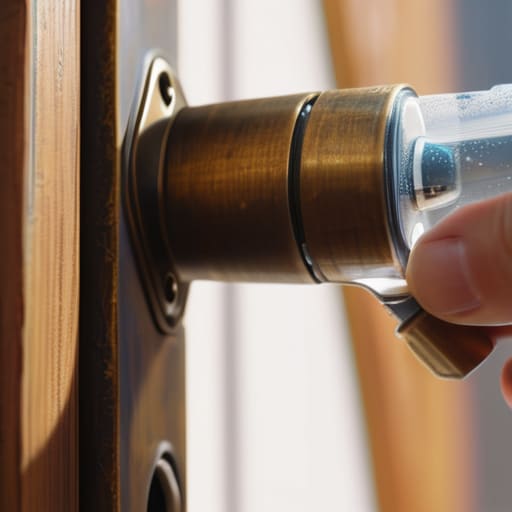
So, you’ve got the tools, but you’re standing in the hardware aisle staring at two very different cans, wondering which one is actually worth your money. This is the classic WD-40 vs silicone spray for doors debate, and honestly, most people get it wrong. If you use standard WD-40, you aren’t actually “fixing” the problem long-term; you’re mostly just cleaning the grit out of the hinge. It’s a great penetrating oil that breaks up rust and grime, but it evaporates quickly. If you just want a five-minute fix to stop a noise while you’re hosting dinner, go for it. But if you want to actually set it and forget it, you need something more substantial.
For real door hinge maintenance tips, I always recommend reaching for the silicone spray. Unlike the blue-and-yellow can we all have in our junk drawers, silicone creates a long-lasting, water-resistant barrier that stays put even as the door swings back and forth. It doesn’t attract nearly as much dust, which is huge if you’re trying to avoid a messy buildup around your hardware. If you’re serious about fixing noisy door hinges once and for all, skip the quick fix and invest in the silicone. Your future, quieter self will thank you.
Using Simple Household Items to Stop Door Squeaks
Look, I get it. Sometimes you realize a hinge is acting up, but you’re halfway through a project or just don’t want to run to the hardware store. The good news is that you probably already have something in your pantry or bathroom cabinet that can handle the job. If you’re looking for quick household items to stop door squeaks, skip the specialized kits and grab some petroleum jelly (Vaseline) or even a bit of cooking oil. A tiny dab on the hinge pin can act as a temporary buffer that kills the noise almost instantly.
If the squeak is particularly stubborn, you might need to go a step deeper by removing the door pin for lubrication. Once the pin is out, coat it thoroughly with a bit of bar soap or even some heavy-duty hand cream. It’s not a permanent professional fix, but it’s a brilliant way to manage the sound until you can get the “proper” stuff. These little hacks are part of my favorite kind of door hinge maintenance tips: they’re low-effort, zero-cost, and they actually work when you’re in the middle of a busy week and just need some peace and quiet.
A few extra things to keep in mind so you don't make a mess
- Don’t go spraying everything blindly; grab a paper towel or a rag to catch the drips. There is nothing worse than fixing a squeak only to realize you’ve left permanent grease stains all over your door frame.
- If you’re using a spray, do it in small bursts. You don’t need a whole can of lubricant to fix one hinge, and overdoing it just creates a sticky mess that attracts dust and hair.
- Give the door a little wiggle after you apply your fix. Moving it back and forth helps the lubricant work its way deep into the pin where the actual friction is happening.
- Check your alignment while you’re at it. Sometimes a squeak isn’t just about dryness; it’s because the door is slightly crooked and rubbing against the frame. A quick tighten of a loose screw can be a lifesaver.
- Keep a small “fix-it” kit in a kitchen drawer with a can of silicone spray and some old rags. It’s much better to deal with a squeak immediately than to let it drive you crazy for three weeks.
The bottom line on quiet doors
Don’t overcomplicate it—if you have a can of silicone spray or even some cooking oil in the kitchen, you’re already halfway to a fix.
Skip the fancy heavy-duty lubricants unless you’re dealing with a massive industrial door; for most of us, a quick spray on the hinges is plenty.
Aim for a quick win rather than a perfect one; get the squeak gone now, and you can worry about a “professional” fix another day.
## The takeaway
“You don’t need a professional handyman or a specialized toolkit to fix a noisy door; you just need to stop overthinking it and use whatever is actually in your junk drawer right now.”
Nadia Halloway
The bottom line on squeaky doors
At the end of the day, fixing a squeaky door doesn’t require a massive trip to the hardware store or a specialized toolkit you’ll never use again. Whether you decided to go the professional route with a bit of silicone spray or you just grabbed some cooking oil from the pantry to get through the night, the goal was the same: stopping the noise with as little friction as possible. You’ve learned that while WD-40 is a classic, it’s not always the long-term fix, and sometimes the simplest household items are actually your best friends when you’re just trying to get through a busy week.
I know it feels like such a tiny, insignificant thing, but these little home maintenance wins actually matter. It’s not about having a showroom-perfect house; it’s about creating an environment that doesn’t grate on your nerves every time you walk into a room. We spend so much time worrying about the big, overwhelming projects that we forget how much small, repeatable wins can improve our daily headspace. So, go ahead and silence that hinge. You’ve earned a little bit of peace and quiet.
Frequently Asked Questions
What if the squeak doesn't go away even after I've lubricated the hinges?
If you’ve lubed the hinges and that annoying screech is still haunting you, it’s probably not a friction issue—it’s a structural one. Check if the door is sagging or if the screws are actually loose. Sometimes the hinge is just pulling away from the frame. Grab a screwdriver and tighten everything up first. If it’s still acting up, you might need to shim the hinge or look into a door realignment. Don’t panic; it’s usually a quick fix.
Is there a way to fix a squeaky door without taking the actual hinge pins out?
Honestly, please don’t pull those pins unless you absolutely have to. It’s a massive hassle and usually ends with a pile of tiny parts lost under the radiator. You can almost always fix the noise just by lubricating the gaps while the door is hanging. Just spray your lubricant or drip a little oil directly into the hinge seams and work the door back and forth. It’s faster, less messy, and way less stressful.
How often am I supposed to re-apply oil or spray so the noise doesn't come back?
Honestly? There’s no magic schedule, but if you’re treating it like a “set it and forget it” thing, you’ll probably be hearing that squeak again sooner than you think. If you use a heavy-duty silicone spray, you might get months. But if you went the DIY route with something like cooking oil, expect to re-apply every few weeks. Just listen to the door—the moment it chirps, it’s time for a quick touch-up.
Will using something like cooking oil or Vaseline eventually gunk up my hinges or ruin the finish?
Look, I get the hesitation. I’ve definitely ruined a thrifted side table before by being too aggressive with DIY fixes. Here’s the truth: cooking oil is a temporary band-aid. It works in a pinch, but yes, it can get gummy and attract dust over time. Vaseline is a bit better because it’s thicker, but it’s still messy. If you want a “set it and forget it” solution that won’t gunk up your hardware, stick to a proper silicone spray.
