The Fundamentals of Sewing for Beginners
Please, stop scrolling through those Pinterest boards filled with $500 sewing kits and “must-have” designer notions that you’ll never actually use. I used to think I needed a professional studio to start, but honestly, that’s just more clutter we don’t need. When I first started tackling sewing basics for beginners, I was drowning in expensive fabric shears and complicated tutorials that assumed I already knew how to thread a machine. It felt like I was being sold a lifestyle of perfection rather than a practical skill, and frankly, it was exhausting.
I’m not here to turn you into a couture fashion designer overnight or convince you to overhaul your entire living room into a craft room. My goal is to give you the actual, unglamorous sewing basics for beginners that will help you mend a torn hem or repurpose a thrift store find without losing your mind. We’re going to focus on a few reliable tools and simple, repeatable techniques that work even when your workspace is cramped and your patience is thin. Let’s get to the stuff that actually matters.
Low Stress Sewing Notions and Supplies You Actually Need
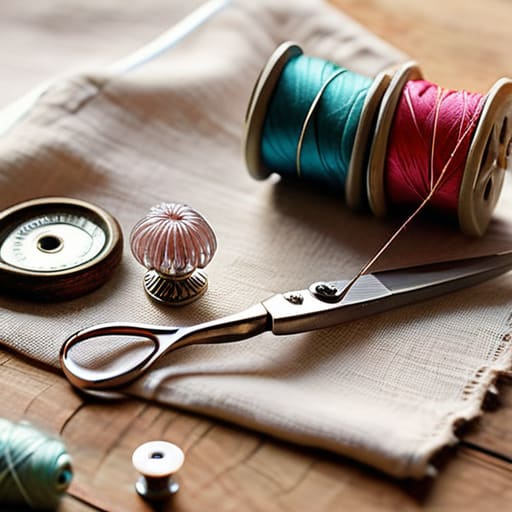
Look, I know the aisles at the craft store are designed to make you feel like you’re failing if you don’t walk out with a $300 rotary cutter kit and a dozen specialized presser feet. But honestly? That’s how you end up with a drawer full of expensive clutter that just gathers dust. When I first started, I tried to buy everything at once, and it was overwhelming. Instead, focus on a few essential sewing machine tools that actually do the heavy lifting. A decent pair of fabric shears (don’t use them on paper, please!), a seam ripper (your new best friend), and some glass-head pins are all you really need to get moving.
When it comes to your stash, don’t get bogged down in the complex world of silk or heavy upholstery. Stick to some simple sewing notions and supplies like an all-purpose polyester thread and a handful of cotton or linen blends. These sewing fabric types for beginners are much more forgiving when you’re still figuring out your tension. If you keep your toolkit lean and functional, you spend less time managing gear and more time actually making things. It’s about building a system that works, even when your workspace is a total mess.
Understanding Sewing Fabric Types for Beginners Without the Overwhelm
Walking into a fabric store is a sensory overload waiting to happen. Between the endless rolls of silk and the intimidating displays of high-end wool, it’s easy to feel like you need a degree just to pick a yard of cotton. But here’s the truth: you don’t need to master the entire textile industry to make something functional. When you’re looking into sewing fabric types for beginners, my best advice is to start with “stable” fabrics. I’m talking about woven cottons, like quilting cotton or linen. These fabrics don’t slide around or stretch uncontrollably while you’re trying to work, which means less time fighting your material and more time actually seeing progress.
Avoid the temptation to jump straight into slippery satins or heavy, chunky knits. Those require specific needles and a level of tension control that can lead to instant beginner sewing machine troubleshooting if you aren’t prepared. Instead, stick to natural fibers that behave predictably. A simple cotton poplin is a dream to work with because it stays where you put it. Once you’ve built some confidence with these predictable basics, then—and only then—should you start experimenting with the more temperamental stuff. Keep it simple, keep it stable, and you’ll actually finish your project.
Five ways to actually get sewing without losing your mind
- Stop trying to master the complex stuff first. Pick a project with straight lines—like a pillowcase or a simple tote—and stick to it. You don’t need to sew a fitted sheet on day one to prove you’re a “real” sewist.
- Embrace the seam ripper. I used to view it as a sign of failure, but now I see it as my best friend. If a seam is wonky, rip it out and try again. It’s not a setback; it’s just part of the system.
- Ironing is secretly half the battle. If you want your projects to look like something you actually bought rather than something you haphazardly stuck together, press your seams flat as you go. It makes a massive difference in the final result.
- Don’t overcomplicate your thread choices. You don’t need a rainbow of expensive silks right now. Just grab a few solid spools of high-quality all-purpose polyester thread in neutral colors. It’ll work for almost everything you throw at it.
- Let go of the “perfect” expectation. Your first few projects are going to have wonky edges and slightly crooked stitches. That’s fine. The goal isn’t a museum piece; it’s just getting a functional item made by your own hands.
The "Keep It Simple" Sewing Cheat Sheet
Don’t get paralyzed by the aisles of craft stores; start with a few quality essentials like decent shears and a basic needle set rather than a massive, expensive kit you’ll never use.
Focus on learning how your specific fabric behaves—whether it’s a stable cotton or a tricky knit—before you even touch a machine to avoid a massive headache later.
Prioritize small, repeatable wins over complex projects; it’s better to master a simple straight seam on a scrap of fabric than to burn out trying to sew a whole wardrobe in a weekend.
## Forget the "Pro" Setup
“You don’t need a studio full of expensive gadgets to make something beautiful; you just need a few reliable tools and the permission to let your first few stitches be a little messy.”
Nadia Halloway
Stop Overthinking and Just Start
Look, I know it feels like you need a dedicated studio and a mountain of specialized tools to actually call yourself a “sewer,” but that’s just not true. We’ve covered how to pick the right notions without breaking the bank and how to navigate the fabric aisle without having a total meltdown. The goal isn’t to build a museum of sewing supplies; it’s about having a functional toolkit that lets you actually create something. Remember, you don’t need the most expensive linen or a professional-grade cutting mat to make something beautiful. You just need the basics and the willingness to make a few mistakes along the way.
At the end of the day, your first few projects might look a little wonky, and your seams might be slightly crooked. That is perfectly okay. I’ve spent years restoring old furniture, and I promise you, the magic isn’t in the perfection—it’s in the process of making something with your own two hands. Don’t let the fear of a messy stitch stop you from starting. Focus on small, repeatable wins, like finishing one simple hem or sewing a single button. Once you get those tiny systems down, the rest will follow. Now, go grab that scrap fabric and just see what happens.
Frequently Asked Questions
I have a sewing machine from my aunt, but how do I know if it's actually functional or just a heavy paperweight?
First, don’t panic—most of those old machines are tanks built to last. To see if it’s a keeper, plug it in and see if the motor hums without sounding like it’s grinding gravel. Then, try a “test stitch” on a scrap of cotton. If it’s skipping stitches or bunching up fabric, it probably just needs a professional tune-up. It’s worth the service fee to turn a heavy paperweight into a reliable tool.
How much space do I realistically need to set up a sewing station without turning my entire living room into a fabric graveyard?
Look, you don’t need a dedicated craft room to start. If you try to clear out the whole dining table, you’ll burn out by week two. I swear by the “go-bag” method: a sturdy rolling cart or even just a single plastic bin that holds your machine and essentials. When you’re done, it tucks into a corner or a closet. Aim for a footprint smaller than your desk, and keep it mobile.
Is it worth investing in a decent iron now, or can I just use the one I use for my laundry?
Honestly? Stick with your laundry iron for now. I’m a huge advocate for not overcomplicating things before you’ve even found your rhythm. If your current iron gets the wrinkles out of your shirts, it’ll get the seams flat for your first few projects. Save that extra cash for more fabric or a decent pair of shears. Once you realize you’re actually sewing regularly, then we can talk about upgrading to a dedicated steam station.
What’s the best way to keep my thread and scraps organized so I'm not constantly digging through junk bins?
Look, I’ve spent way too many hours digging through a “junk drawer” of tangled thread and fabric scraps. It’s a productivity killer. My rule? Stop trying to organize everything perfectly and just categorize by frequency of use. Keep your most-used threads in a small, clear container right where you sit. For scraps, grab a few glass jars or even old mason jars. It’s not about a Pinterest-perfect setup; it’s about seeing what you have without the chaos.